Over the last month, we have discussed how students can become more engaged, self-directed, and responsible for their learning. We’ve shared ideas of how to get started with these ideas.
As a quick refresher of the past episodes...
First, we introduced students self-assessing using a single-point rubric. This helps students become more self-directed and reflective in their learning, which, in turn, helps promote motivation. Then, using the single-point rubric as a guide, students record evidence of their learning in a digital portfolio. Using portfolios places the responsibility on the student to reflect and communicate their understanding. In addition, using a single-point rubric keeps the focus on specific parts of the learning and makes the process less overwhelming. Next, we shared resources to build student feedback teams. This step has a strong emphasis on the building and less on the feedback. Even as adults we know that one must have solid working relationships with those that are providing feedback for it to be effective. These long-term teams need to be developed over time before they can be utilized.
Finally, we are partnering student feedback teams with a digital tool, Flipgrid, to make feedback attainable anywhere and at any time. After students have documented their learning within their student portfolio, the conversation is just beginning. Students can share their learning with peers by creating a screen recording explaining their artifact. Student feedback teams are created by the teacher in the Flipgrid dashboard. Students share and provide feedback within these pre-created groups. Teachers are able to moderate and monitor student responses. Below you will find more in-depth details about how to use Flipgrid with your students in student feedback teams.

Recording Your Screen
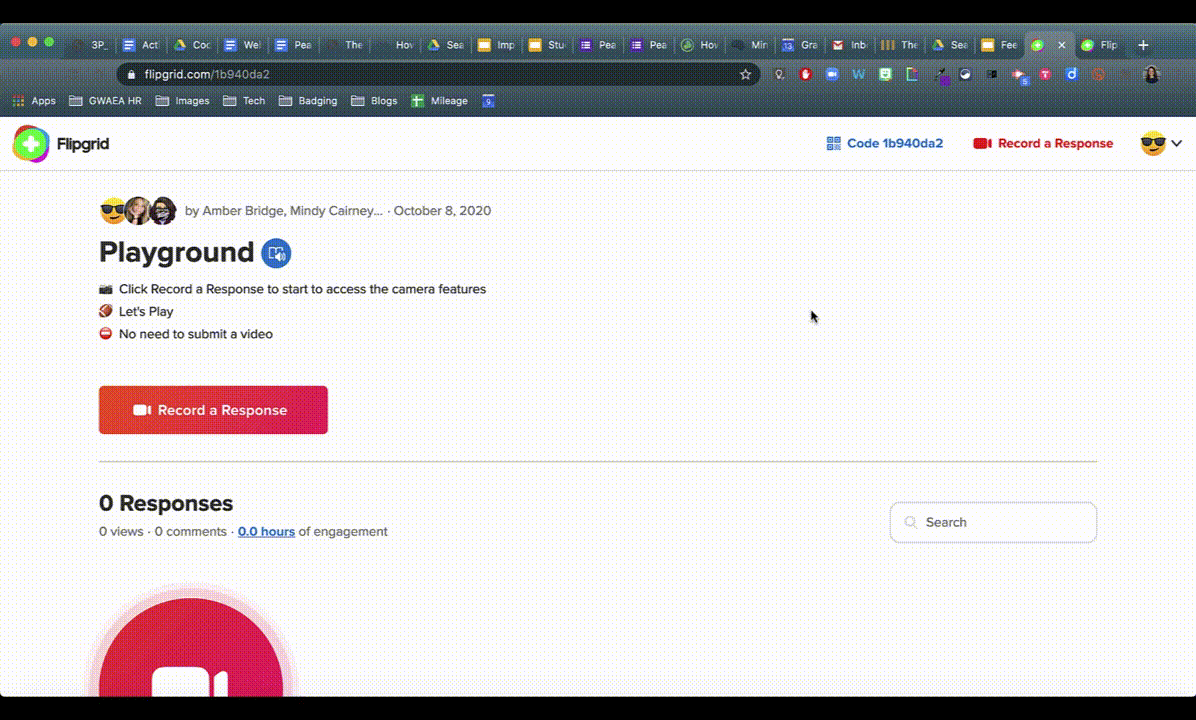
Once you click on Record a Response on your Flipgrid, click on the triple dots Options next to your Record button. Here you'll find Record Your Screen. From here you can choose to record your entire screen, a Chrome tab, or an application window. After you create your screen recording, you'll get the opportunity to do some simple video editing to shine up your video response.
Watch the video below for all the steps towards getting your digital artifact shared.
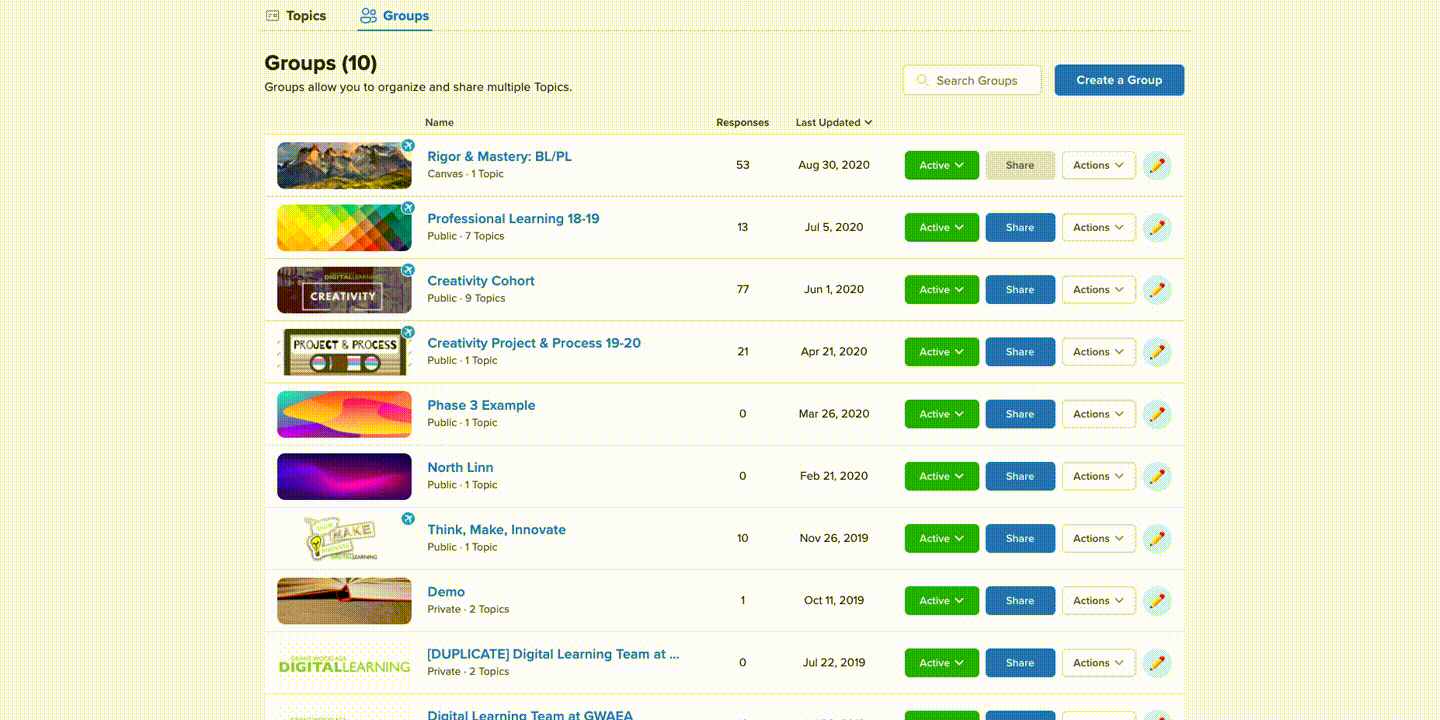
Creating Groups
Groups in Flipgrid keep student feedback teams private and easily accessible. Creating groups allows the teacher to provide a small group space for students to share their learning and gain feedback from their team in a safe space. Teachers are also able to moderate videos, as needed.
- Create a Topic: The teacher will want to create an overarching topic for student feedback teams. For example, let’s call the topic: Feedback teams.
- Turn on Video Moderation: Especially if you are just getting started with feedback teams on Flipgrid, you may want to turn on video moderation. This will allow you to view videos before approving them to be seen by the teams. As you become more comfortable and get to know the team dynamics better, you can turn this off for a more immediate feedback experience.

- Create a Group: These groups will each need to be named and will be private to the members of the group, but will fall under the one overarching topic.
- Invite Members by email address or password
- Add Topics: Since you created a topic before organizing your small groups, you can choose the ‘Feedback Teams’ topic from the drop-down menu.
Stickies and Backgrounds

One of the hidden gems in Flipgrid is sticky notes! One of the issues when creating a video is where to put your notes. Sticky notes to the rescue.
- Step 1: Student jots down notes as they interact with another student’s work
- Step 2: Student opens the Flipgrid topic and clicks “Record a Response”
- Step 3: In the top right corner there are two icons - the top (book) will open the original topic video the other opens a sticky note.
- Step 4: Student would type or paste the feedback notes into the sticky. This can be moved around the screen AND like magic it does not appear on the final student response!
Why would this be helpful?
Not everyone feels comfortable just talking on the screen, sticky notes eliminates some of the jitters around filming. It would also help with remembering key points and details - adding specificity to the feedback.
|
BACKGROUNDS
Although our teens live in the digital world, many would prefer not to have their faces recorded for class work. Flipgrid has them covered as well! With one click they can convert their image into a a lego block or a pixelated lock Step 1: Student opens the Flipgrid topic and clicks “Record a Response” Step 2: Click on Effects and Filters Step 3: Choose the Lego block or the pixelated options to blur your face Step 4: Explore the other options to be able to add stickers, or frames or even a board where you could type out the points to be made in your feedback |
|


Feedback depends on trust and comfort between peers. Being able to customize your video and add your own personal flair helps that connection. On the flip side, if students are self-conscious about their home environment or themselves, being able to blur details may help them be more honest in their on screen feedback.
An Additional Gem!
Wakelet is a bookmarking tool that allows you to save anything with a link. It can be used in a variety of ways! Wakelet takes bookmarking one step further by integrating Flipgrid 'Shorts'. Because of these additional tools, Wakelet could also be used as a student portfolio. This could be a powerful way for students to add voice and feedback!