
Google Slides just got better! Pear Deck Premium was recently purchased for all of our Iowa educators as an excellent add-on for Google Slides. It allows the teacher to create and add interactive elements to a Google Slides presentation to engage students, gauge social emotional well-being, and gain data and feedback about student learning. Additionally, Pear Deck allows students to respond during an instructor-paced or student-paced mode, providing a variety of learning opportunities for any learning environment.
To get started with Pear Deck there are a few things you need to do. First of all, login to Pear Deck by using your school domain Google account to authenticate. Once you are logged in, your profile picture should be wearing a crown to signify you have a Premium account.
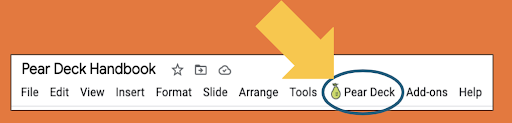
Next, start a Google Slides Presentation and click on ‘Add-ons’. Then, select ‘Get Add-ons’ and search for, select, and install Pear Deck. Now Pear Deck will be accessible in each Google Slides presentation you initiate.
Lastly, you may want to install the Pear Deck Power Up Chrome Extension. It helps run videos and gifs more smoothly in Pear Deck. After installing it, you will see it in your Google Slides toolbar.
Now you are ready to explore Pear Deck!
| By clicking on the Pear Deck icon in your Google Slides toolbar, you will instantly open up a side panel to help you begin building. At the top of the panel, you will find a template library full of lesson builders, learning development, and content area slides ready to be selected and added to your Slides. | 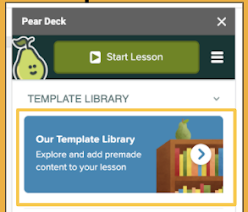 |
| Feeling creative? You can build your own interactive slides from scratch by choosing a question type to add to the Slide and building from there. Additionally, you can add audio files to your Slides for a multimedia approach to your questions (more to come about that in a later post). | 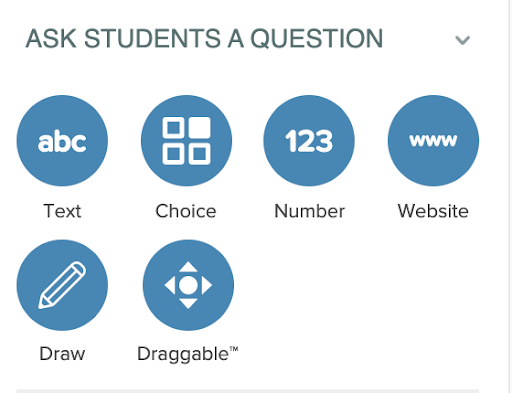 |
A few things to consider during the building phase of your lesson:
- Add a social emotional check in from the template library at the start of each lesson.
- Decide on whether the Pear Deck will be shared as an instructor-paced lesson (synchronous) or student-paced lesson (asynchronous). This might help form the types of Pear Deck templates/questions you choose. (Watch for a future blog post about why and when you might use these different paces.)
- Add content you would like students to engage with onto Slides between the added Pear Deck Slides, especially for student-paced lessons. Pear Deck Slides should be used as a processing, reflecting, connecting or formative assessment tool.
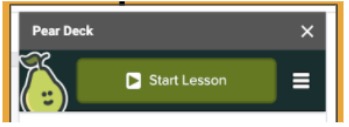
Once your build is complete, it will be time to share the lesson with your students. In the side panel, you will find the green ‘Start Lesson’ button. Once you click this, it will give you two different options to deliver the lesson to your students. Choose instructor-paced or student-paced.
If you have chosen instructor-paced mode, students can go to joinpd.com and enter the code that is generated at this time. Or click on ‘Give Students a Link’ below the big pear and send the link through a Zoom/Meet chat or in your learning management system, like Google Classroom.
Now you are ready to play! We suggest pairing your Pear Deck with a colleague to try it out before using it with students. Let us know what questions you have! Check back on Thursday to learn when to use instructor-paced and student-paced sessions!
Additional Resources
- DLGWAEA's Pear Deck One-Pager
- DLGWAEA's Pear Deck Handbook
- Edtech Take Out: Episode 81: Perfect Pear Deck Presentations
Content submitted by Amber Bridge, Mindy Cairney, & Beth Swantz, Digital Learning Consultants at Grant Wood AEA.